In recent years, travel blogging has become more than just a hobby; it has become a viable career choice for many aspiring bloggers and digital nomads. Imagine exploring the world, sharing your experiences, and earning a living from your laptop. If experiencing new cultures, tasting exotic foods, and making memories while building an audience excites you, it’s time to consider starting a travel blog. In this guide, we’ll take you through 11 easy steps to launch your travel blogging adventure, from defining your niche to monetizing your efforts. Let’s begin this exciting journey together.
Whether you want to become a full-on digital nomad or work by day and travel blog by night, you have to start somewhere. Here are eleven simplified steps to starting a successful travel blog today.
Starting a travel blog isn’t the tricky part. What is tricky is sticking it out and becoming a successful travel blogger. I am here to help you get started, but it is up to you to spend the time, work hard, and invest in yourself after that.
This post will explain how to get started, including tips on choosing a name for your travel blog, purchasing hosting, and selecting the necessary startup plugins. Then, we’ll have some fun brainstorming ideas for compelling blog post headlines.
Once you’re up and running, you must dive deeper into aspects of your travel blog, including the business side of blogging, social media marketing, SEO, and affiliate marketing. Then, I will end this post with the best courses I have completed to help you with these topics.
Below is a table of contents if you wish to proceed to a particular topic of how to start a travel blog.
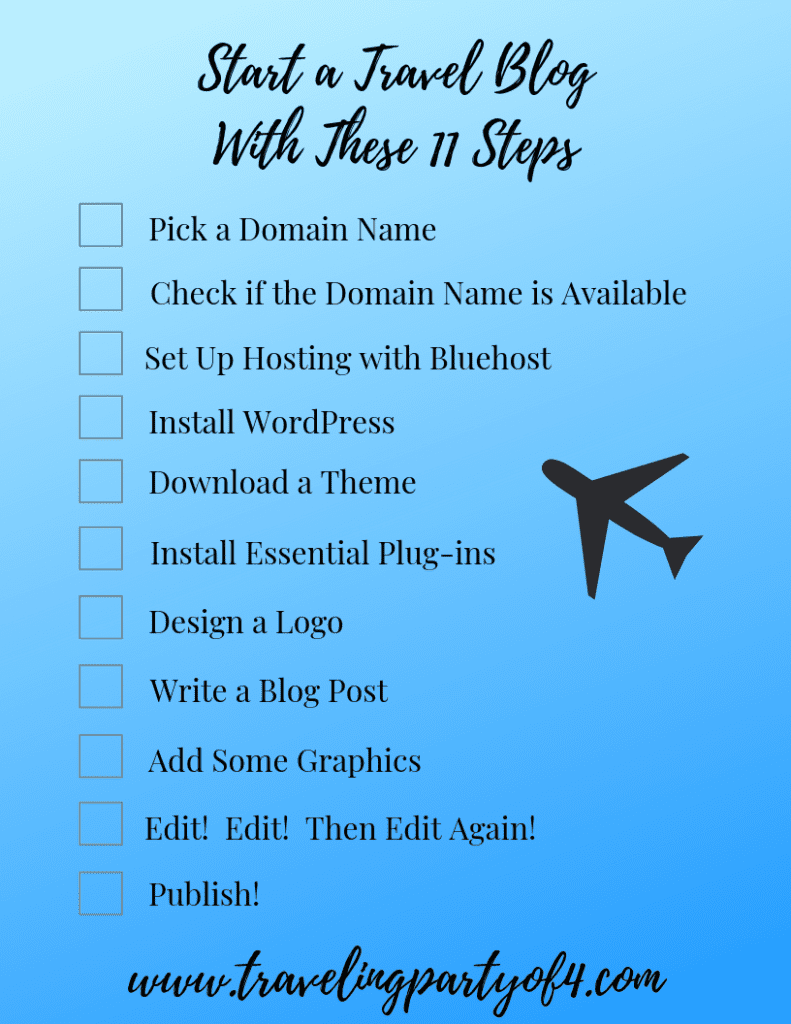
- Step 1 How to Start a Travel Blog: Pick a Domain Name.
- Step 2: Check the Availability of Your Chosen Domain Names.
- Step 3: Set Up Hosting.
- Step 4: Install WordPress.
- Step 5: Download a Theme.
- Step 6: Install Essential Plug-ins.
- Step 7: Design a Logo.
- Step 8: Write a Blog Post.
- Step 9: Edit, Edit, and Then Edit Again!
- Step 10: Add Some Graphics.
- Step 11 in How to Start a Travel Blog: Hit Publish.
- Before I go, I need to share a few more things that are super helpful when starting a travel blog.
Create a solid foundation to build on from the beginning, and you will be on your way to a beautiful and fun travel blog with which you can do anything, including making extra cash. Follow these 11 quick steps on how to start a travel blog; it is easy to get started. Once you get things up and running, the fun begins. It’s a long one, so grab a cuppa joe or a glass of wine, your travel journal, and some vacation pictures for inspiration, and let’s start a travel blog.

Affiliate Disclosure: There are affiliate links throughout this post. This means if you click on a link and purchase a product through that link, then I will receive a small commission for the referral. And that is kinda cool.
Step 1 How to Start a Travel Blog: Pick a Domain Name.
Choosing the perfect travel blog name may be one of the most overthought tasks for new bloggers. Try not to let the process of selecting a name for your travel blog postpone getting started. Your content will make your blog successful, not the name. Therefore, choose your blog name and get going.
Your blog’s name is your brand’s first impression and is crucial in attracting readers. A catchy, memorable name can help you stand out and make your blog easy to find. Start by brainstorming keywords related to your niche, travel, and unique perspective. Combine these words creatively to generate name ideas that reflect your blog’s essence.
Ensuring your chosen name is available as a domain and across social media platforms is essential. Use tools like Namecheap and Instant Domain Search to check domain availability. A consistent brand identity across platforms will help you build credibility and make it easier for your audience to find and engage with your content.
Let me share a story. I had this wild idea that I could become a travel blogger. So, I came up with a travel blog name and bought it. That’s easy, right? Way too excited to get started, and now I own three domains.
The first one I bought was Travel With Tweens. I realized my kids were almost teens; therefore, that blog name wouldn’t last (not evergreen). I then bought Travelling Party of Four (with 2 L’s). I live in the US, and that is not how we spell traveling here. I could have kept it, but Traveling Party of Four was available. Although “they” say not to use a number (or the word traveling, for that matter).
My advice to you during this stage of starting a travel blog is taking a day or two to develop your travel blog name. Don’t be hasty or too eager, or you will make the mistakes that I made. I like the name I chose, and I am sticking with it. But, it would be different if I had appropriately researched how to name my new travel blog.
The name you choose for your travel blog is a direct reflection of you and should exemplify your hefty plans for your website. Your name becomes your brand. And if all goes as planned, it becomes your career and income. Having a travel blog name that shows your readers what your blog is about helps build trust as well as SEO.
However, your blog name will not make or break you.
Your content will.
Brainstorm first. I love a thorough brainstorming session; it is motivating and gets me in the zone. Grab a pad and pencil (maybe a glass of wine) and go for it. Write down everything that comes to mind.
Do this.
- Make your domain name relevant to your blog. Think about the type of travel blog you plan on creating. Are you a digital nomad? A solo traveler or traveling with family? Backpacker, camper, or RV’er? Or are you going to be blogging about a specific destination? Australia or the Caribbean? India or the Philippines? The United Kingdom or the United States?
- Use keywords in your domain name.
- Use a thesaurus. Look for synonyms for words you use to describe travel.
- Look at other blogs to see how they have created their domain names. I don’t mean to copy them; you can’t, just see what they are doing.
- Make sure it is not too long. Try to get under 15 characters, definitely under 20 characters.
- Don’t be afraid to use your name. I wish I had.
- Make it unique but memorable.
- Keep it clear and straightforward.
- Make it evergreen. You’ll age out of your twenties, and your travel philosophy will change, so keep that in mind. And your kids won’t stay kids forever.
- Now that you have many possibilities narrow this down to your five favorites.
- Check social media accounts for availability, including Facebook, Instagram, Pinterest, Twitter, and TikTok.
Don’t do this.
- Don’t stress yourself out over your blog name. It will not make or break your success.
- Many words in blog post titles are saturating the web. Try to create something unique and avoid the words nomad, wanderlust, backpacker, and budget.
- Avoid numbers, hyphens, or symbols. I did not know this rule when I named my travel blog Traveling Party of Four.
- Avoid incorrect spellings. They may seem clever, but they can be confusing and won’t be memorable.
- Don’t postpone your travel blog while stuck on a name.
It may help to step away from this task for a day or two. Meditate. Pray. Eat. Drink. Go for a run. Ignore it. Of course, as impulsive as I am, I did not heed this advice. Learn from my mistakes and step away before making this decision.

One more thing. Make sure your blog title reads appropriately as a URL.
- Pen Island ~ http://www.penisland.net.
- Go Tahoe North ~ http://www.gotahoenorth.com.
- Master Bait & Tackle ~ http://www.masterbaitonline.com.
- Old Man’s Haven ~ http://www.oldmanshaven.com.
- And anything with “therapist” in the URL.
Step 2: Check the Availability of Your Chosen Domain Names.
Check to see which of your five chosen domain names are available; this may help narrow down your options a little further. Check to see if a domain is available by googling it. Or you can use the domain checker on the Bluehost website. Type in your domain name below and check to see if it is available. Easy as that.
Also, check social media channels to see if someone else is using your chosen domain name as a handle.
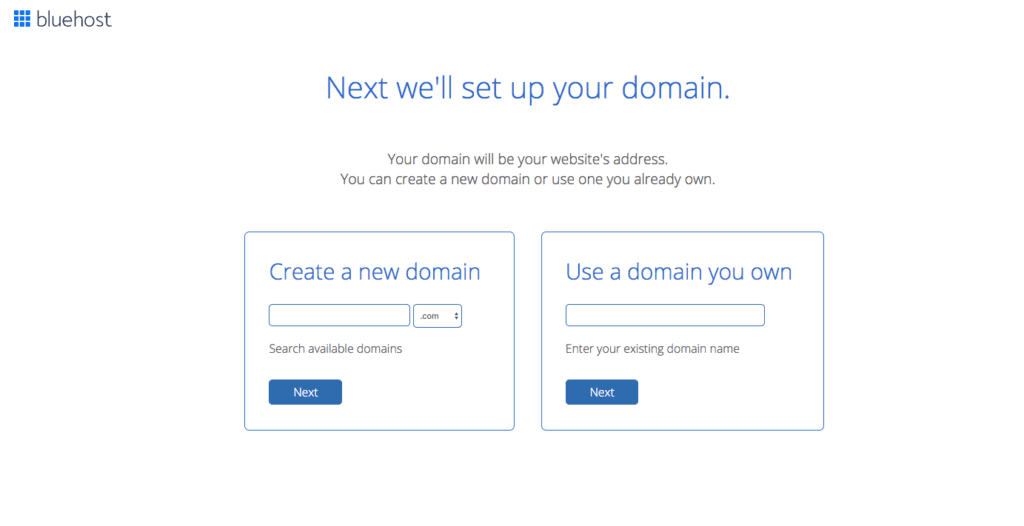
Now that you’ve chosen your domain name and it’s available purchase it from Bluehost and move on to the next step: setting up hosting for your new website.
Step 3: Set Up Hosting.
After researching ad nauseam regarding whether to buy hosting for my travel blog, I decided to go for it. You need hosting if you want to make money with your travel blog. If you’re going to blog as a hobby for yourself, friends, and family, you probably do not need hosting. As I understand it, after reading until I couldn’t anymore, it is nearly impossible to monetize a blog without hosting.
Bluehost is one of many hosting sites for your blog. I found Bluehost to be user-friendly when I needed it the most and inexpensive at $3.95/month. Although you are required to purchase an entire year in the beginning, it is still less than $50 for a year of hosting. Bluehost provides free domain registration and automatic WordPress installation (see step 4).

Step 4: Install WordPress.
Once you purchase web hosting with Bluehost, you can install WordPress with one click.
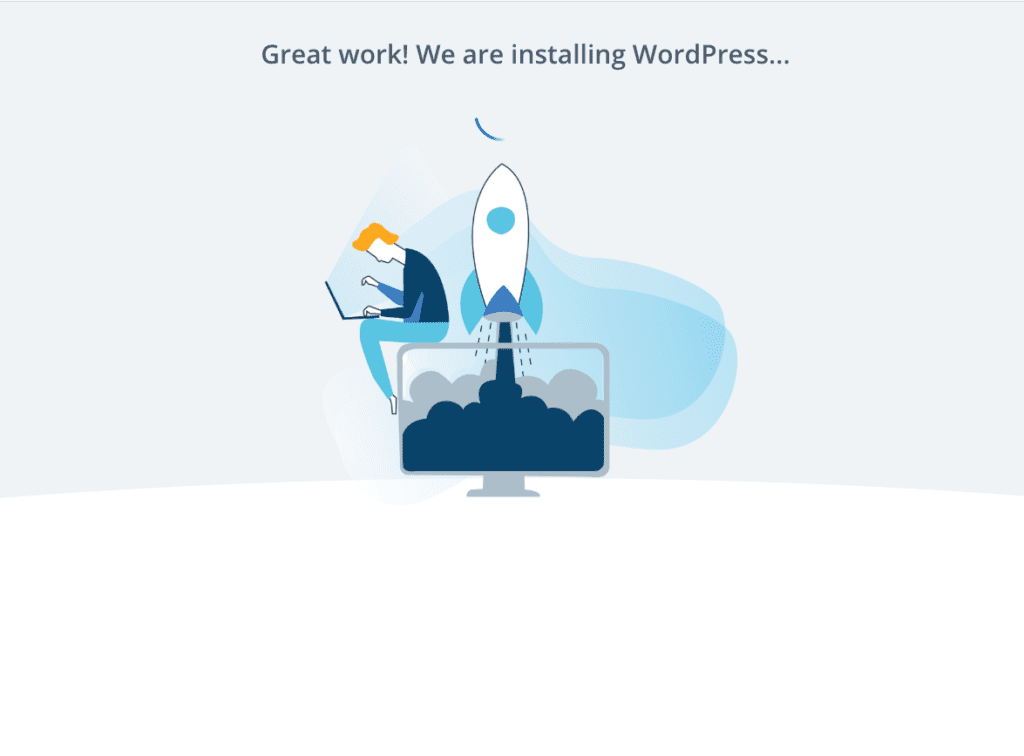
Bluehost provides simplified and thorough tutorials to help you complete the installation step quickly. Once you have installed WordPress, you will be given your website URL, the admin login URL, username, and password. Ensure you jot this information down somewhere safe or store it on your smartphone.
Log in to WordPress; this will take you to your dashboard. Now, the fun begins. Everything—designing, writing, editing, and publishing—is all right here in this magical dashboard.
Step 5: Download a Theme.
OK. I know it is a lot at this point, but stay with me. You can do this.
Choosing a theme is important, but you don’t have to lose sleep over it. Themes can be changed quite simply on WordPress with only minor adjustments. You can see how several look before choosing “the one.” However, I wouldn’t change them up too frequently once you have selected “the one.”
What is essential in a theme?
- How it looks (obviously).
- How it reads on mobile and desktop. You want it to be easy on the eyes.
- Page speed; some are slower than others.
- Options for customization. It is helpful that these themes are designed for us, but you still want to personalize your site.
WordPress offers free themes that are easy to use and look good. However, you can purchase a theme designed by a third party. Make sure that the new theme is compatible with WordPress updates.
I am currently using a Bluchic Theme Called The Maggie Theme. Bluchic has many themes to choose from that are easy to work with, even if you are not tech-savvy.
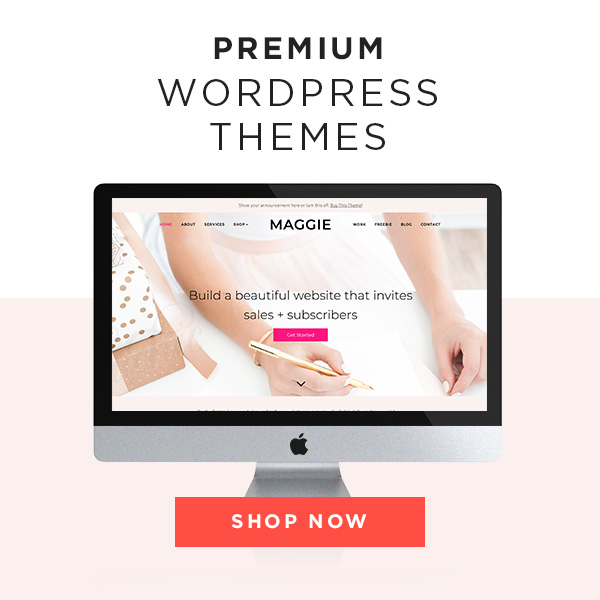
Fair warning here: Prepare to spend lots of time with your theme, customizing colors, menus, images, and your logo. Don’t get overwhelmed. Ask for help if you need it.
Step 6: Install Essential Plug-ins.
Ahhhhh…plug-ins! We are getting there.
Plug-ins add more functions to your blog. Some plugins protect your blog from spammers; others track your stats, facilitate email and social media marketing, and help you manage blog post scheduling.
Plug-ins are essential to your website, and you do need them. However, be careful with too many, as they can slow down your site speed. I think most of us agree with the basics you need to get started.
- Yoast SEO. Your very own on-page search engine optimization (SEO). There is a free version as well as a paid premium version. Yoast SEO is a must.
- Akismet Anti-Spam. Reviews and filters every comment that is shared on your website. It is incredible that a website like mine would even attract spammers, but it did before Akismet. Not today, Spammers!
- Monster Insights. Keeps track of Google Analytics.
- Smush Pro. Optimizes and resizes images to save space and speed up your website.
- Editorial Calendar. I didn’t think I needed this, but wow, it’s made a difference in planning and productivity.
Grammarly ~ Not really a plug-in, but you need this, too. Proper grammar is essential if you want people to believe in you. And trust that you have credibility. In general, I am okay with grammar. But I have made some ugly mistakes saved by Grammarly.
There are many plug-ins available — lots of social media plug-ins to try. You will find the ones that you need and like after trying a few. If you don’t like how a plug-in is performing, it can be simply deactivated and deleted.
Step 7: Design a Logo.
Google this: How to design a logo for your blog.
What did you come up with? So many awesome ideas out there for logo design. You need a logo for your website that is eye-catching, memorable, and makes a great first impression.
If you are the creative type (I am not), you can design your own. Some graphic design websites have logo templates, including Canva and PicMonkey. Or you can buy a logo from Etsy or Fiverr.
Step 8: Write a Blog Post.
OMG! Already?
I know, at first, all you want to do is write. I did, too. And I wrote and wrote pretty aimlessly. I am still cleaning up after that new and way overzealous blogger self. But, boy, was that fun. I had a lot to share.
Have a plan for your blog post. Come up with an idea. Do your keyword research (we will get to that later), create a catchy keyword-rich blog post title and an outline, expand on your outline, and then write.
11 Tips for Writing Compelling Blog Post Headlines
Think of your headline as your sales pitch. And your blog post is the item that you are selling. If your sales pitch doesn’t spark interest, then guess what? No thanks, and no click.
Your compelling blog post headline is what people see first when searching for answers to their pain points. It has to be good.
You will spend tons of time researching your blog post topic, choosing keywords for SEO, writing the blog post, and looking at all sorts of stock photos — editing, then adding affiliates and promoting. However, your blog post won’t get clicks unless the headline is so dazzling that it is the chosen one for your audience and search engines.
Now is your opportunity to shine, to convince them that you have the answer to their burning question. Creating a killer headline for your blog post is as important as the content you write. Think about it; if they don’t feel they need to click your headline, they won’t even see your content.
These eleven simple tips for writing a compelling blog post headline will ensure a brilliant first impression for your audience and search engines.
- List Post Headline. A list post headline is one of the most popular types of headlines that convert. The list promises multiple solutions to a question or problem. For example, what to pack for a specific destination, what to buy your mom for Mother’s Day, or adventures to include on your travel itinerary. These headlines guarantee what information the reader will gain from clicking the headline and reading your post—fun fact: odd-numbered list posts convert better than even-numbered list posts.
- “How To” Headline. “How-to” headlines make a promise, similar to a list post headline. This type of post takes a problem or question and provides an in-depth solution, often including a step-by-step guide to solving it. Both How-Tos and List Posts guarantee your audience will learn something valuable in return for clicking through to your post.
- Use Keywords in your blog post headline. You will discover your favorite tool in keyword research and use it religiously to develop the best keyword for your blog post. Mine is Keysearch. And I learned much about keyword research from Mike Pearson’s course, Stupid Simple SEO. (I will tell you more about my favorite courses later).
- Make it personal. Address the reader using “you” or “your” in your headline. Make your readers feel as if you are talking directly to them.
- Make it easy to read. Be concise. Get to the point and make it flow smoothly.
- What is the perfect character length of a blog post title? Different schools of thought exist on exactly how many characters should be used in a blog post headline. CoSchedule recommends 50-70 characters per headline and about 6-8 words. Google and other search engines will cut off your headline if it is too long.
- Use one superlative in your headline; the superlative can be positive or negative. Some research has proven that negative superlatives have more click-throughs than positive superlatives. Possibly because positivity is overused or because negativity is more intriguing to some. For example, “The 11 Worst Plugins that I Used in My First Year of Blogging.” I would have to know about this to ensure I am not making the same mistake. Or “Stop Doing This One Thing and Your Blog Traffic Will Soar.” Immediate click-through for me. Admittedly, I have not tried this tactic in my blogging journey and tend to stick with the more conventional positivity. But it’s definitely worth a try.
- Scare tactics. Like negative superlatives, scare tactics are also irresistible. Don’t you want to know if you are doing something the wrong way? I can’t tell you how many times I have clicked through to a blog post promising me “11 Unusual Things You Should NOT Include in a Blog Post” or “15 Valuable Lessons I Learned From a Failed Blog.” Other negative words you can try are mistakes, risks, misconceptions, and failure.
- Use Power Words. The CoSchedule Headline Analyzer includes a downloadable list of over 180 power words to help you write emotional headlines. Here are some examples to get you started: new, limited, ultimate, surging, genuine, and superior.
- The headline should be pertinent to the content of your article. You need people to trust that your post will be what you promised in your title when they click through. Honesty, authenticity, and trust are critical to an enduring relationship with your audience. Don’t ever trick them. Clickbait is not honorable. According to Merriam-Webster, clickbait is “something (such as a headline) designed to make readers want to click on a hyperlink, especially when the link leads to content of dubious value or interest.” Clickbait will not make you popular.
- Spend time on this process. I mean, put yourself into this process. Start by writing down a generic title that includes your post’s offering. Build on that. I often have 15-20 (sometimes more) title options written down before I come up with one that I love. As a new blogger, I did not understand the importance of a clickable title, which shows. I am slowly backtracking and working on better headlines (and content, for that matter).

A couple more tricks.
Use the Yoast SEO Snippet Preview to see how your blog post title looks in real-time. From there, you may want to amend the wording if necessary.
And the CoSchedule Headline Analyzer.
CoSchedule is a group of online marketing products that help you organize your content strategy and increase productivity. Within CoSchedule, you will find the CoSchedule Headline Analyzer.
CoSchedule Headline Analyzer is a free tool that helps you craft the ultimate headline for your blog post. The CoSchedule Headline Analyzer assesses character count, grammar, spelling, word balance, and readability. All you have to do is type your headline and click “analyze now.” CoSchedule Headline Analyzer will give you a score (aim for 70 or more). It is like when Yoast SEO light turns green; it’s a celebration.
When your score is low, you will receive an explanation of why, along with resources to help you improve. And this is all FREE.
Don’t make the mistake of spending time and energy creating the best blog post ever and then not spending time on your headline. If you do this, no one will find your work, which can be discouraging.
Step 9: Edit, Edit, and Then Edit Again!
You must edit your post if you want to appear credible. I cannot say this enough. Edit! Edit! And then edit again! Read your post aloud; read it to someone on your laptop, and then read it on mobile. Walk away for a bit, return, and read it again.
Make sure your post has a clear structure, is easy to read, and uses proper grammar (casual speaking is okay, but poor grammar is not).

Step 10: Add Some Graphics.
I can spend hours (and I do) searching for graphics. I use my travel pictures if they are good enough. However, many websites have thousands of high-quality images for any topic you search for. I have four favorites:
- Pixistock ~ I will start with Pixistock since this is my most recent discovery. You can join Pixistock at no cost and receive monthly stock images via email. I did this for a few months and fell in love with these stunning images; I now have an annual membership and cannot say enough about them. Take a look for yourself.
- Unsplash ~ Free and full of super fun images. The iPhone app is perfect for checking things in the doctor’s office or the car pick-up line.
- Pixabay ~ Free also and just as fun. Also, an iPhone app that I love.
- Depositphotos ~ Depositphotos.com offers unique, high-quality images you won’t find on free stock photo sites. The different pricing plans depend on your needs. It is inexpensive to join Depositphotos, and you will find photos you won’t find anywhere else.
Step 11 in How to Start a Travel Blog: Hit Publish.
You are nervous; I have been there.
It took me about three days to hit “publish” after completing my first, way too wordy blog post. But, you know what? Just do it. Put it out there; you have to start somewhere.
Start. Share your passion. Everything else will come in time.
Nomadic Matt
You will learn from your mistakes and from other bloggers who have been where you are right now. Maybe your first post won’t be your best post; mine sure wasn’t. But your second will be better, and your third even better. Build on that solid foundation and have fun.
How will you ever learn if you don’t just do it?
So, what do you say? Hit that “publish” button.
And then celebrate.

Before I go, I need to share a few more things that are super helpful when starting a travel blog.
Master Basic SEO for Your Travel Blog
Search engine optimization (SEO) is vital for increasing your blog’s visibility and attracting organic traffic. Begin by learning the basics of keyword research and how to incorporate relevant keywords naturally into your content. Tools like Keysearch and Ubersuggest can help identify high-demand keywords related to your niche.
Pay attention to on-page SEO elements, such as title tags, meta descriptions, and alt text for images. Implementing SEO best practices improves your blog’s search rankings and draws in more readers.
Create Engaging Content for Your Audience
Producing high-quality, engaging content is the heart of any successful travel blog. Start by creating cornerstone content that covers broad topics within your niche, providing a solid foundation for your blog. Use captivating writing, storytelling techniques, and high-quality images to draw readers in and keep them returning for more.
Consider the questions your audience might have and offer solutions, tips, and insights. This approach adds value to your content and increases its shareability. You’ll build a loyal audience by consistently delivering informative and entertaining posts and establish your blog as a go-to resource.
Develop a Winning Content Strategy
Consistency is critical to growing your travel blog, and a well-planned content strategy helps maintain a steady stream of fresh content. Create a content calendar to schedule posts and maintain a regular posting frequency. This approach keeps your audience engaged and improves your blog’s SEO performance.
Monitor seasonal trends and news to develop relevant and timely content. Experiment with different formats, such as listicles, interviews, and photo essays, to add variety to your blog. By planning and executing a content strategy, you’ll maintain momentum and continue to captivate your audience.

Promote Your Travel Blog Effectively
To grow your blog’s audience, you’ll need to promote it actively across various channels. Share your content on social media platforms where your target audience is most active, such as Instagram, Facebook, and Pinterest. Engage with your followers by responding to comments and participating in relevant conversations.
Networking with other bloggers and joining travel communities can increase your blog’s visibility and open doors to collaboration opportunities. Guest posting on established blogs in your niche can also attract new readers and boost your credibility. Leveraging various promotional strategies will expand your reach and grow your blog’s readership.
Learn the Basics of How to Monetize Your Travel Blog
Once your blog has traction, you can explore monetization options to turn your passion into income. Affiliate marketing is a popular way to earn commissions by promoting products or services relevant to your audience. Sign up for affiliate programs related to travel products, gear, or services to start earning.
Sponsored content and brand partnerships are another way to generate income. Collaborate with brands that align with your niche and values to create authentic content that resonates with your audience. To diversify your income streams, you can also create and sell digital products, such as e-books or travel guides.
Affiliate Marketing
Affiliate Marketing, Simplified! ~ Cate Rosales teaches you all about affiliate marketing in a straightforward, easy-to-understand way. This course is for those of you who want to learn how to generate income from your blog.
Cate begins by teaching you how to choose proper affiliates for your niche, followed by how to get approved by these programs. She then moves on to writing a blog post that converts to sales and disclosing affiliates legally to stay out of trouble. She will also teach you how to maximize affiliate sales on social media and through your email list.
Cate has also been approachable with advice and answers to many questions via email. So helpful to be able to find a real person behind that email. She has several other super courses you can check out here:
- How to Start a Money-Making Blog (FREE).
- Boost Your Blog Traffic with Pinterest (FREE).
- Pinterest, Simplified!
- Becoming a Blogger.
Stay Inspired and Safe on Your Journey
Travel blogging offers endless inspiration, but staying motivated and prioritizing safety while exploring new destinations is essential. Keep your finger on the pulse of current travel trends and destinations to inspire fresh content ideas. Follow travel influencers and industry experts for insights and inspiration.
When traveling, always prioritize safety and share tips with your audience for responsible travel. This approach not only protects you but also adds value to your content. By remaining inspired and vigilant, you’ll continue to produce engaging content while minimizing risks.

Now It’s Time to Embark on Your Travel Blogging Adventure
Starting a travel blog is an exciting and rewarding endeavor that allows you to share your passion with the world while exploring new horizons. Following these 11 steps, you’ll be well-equipped to launch and grow a successful travel blog that resonates with your audience. Remember, the key to success lies in staying true to your unique voice and consistently delivering valuable content. Now it’s time to take the leap and start your travel-blogging adventure.
Below are a few other resources to consider in your journey that helped me along the way.
Pinterest Ninja
Pinterest Ninja ~ Mastering Pinterest is crucial to success in your blogging journey. Megan from Love Family Health will teach you everything from setting up a Pinterest Business account to creating the perfect pin, increasing your traffic, using Pinterest to grow your email list, and using Pinterest in your Affiliate Marketing plan.
We all know that Pinterest is an ever-changing world. As of March 2020, an updated Pinterest Ninja was published that added some extra goodies, and I can’t wait to dive in. Megan has now added Pinterest for Etsy, a new 30-minute Tailwind tutorial, a new Pinterest analytics video, a video on Pin Creation in PicMonkey and Canva, plus a video about Pinterest and Affiliate Marketing.
Social Media Content Calendar System by Pixistock.
I know this post is about courses that made me a better travel blogger, but I would be remiss not to mention this bonus Social Media Calendar System by Pixistock.
At the beginning of the year, most of us are dedicated to creating that content calendar. The Social Media Calendar System takes the guesswork out of planning social media throughout the year, a process that can be tough and time-consuming.
The Social Media Calendar System includes the following and more:
- A comprehensive guide to getting you started.
- 365 daily social media post prompts.
- Daily hashtag suggestions in more than 30 niche categories.
- Pixistock photo, video, and Boomerang ideas.
- US holiday ideas and the month’s theme.
- Twelve blank calendars to add your custom prompts.
I would love to hear from you, so please drop me a line and let me know how you’re setting up your travel blog and writing your first blog post.


Great step-by-step for people wanting to start a blog! Thanks!
Thank you. I am trying to keep it simple and basic for beginners.
These are all great tips, especially the list of plugins. I appreciate you sharing these guidelines!
Thank you. It is hard to know which plug-ins we need and which are unnecessary. But, it is simple to delete if not needed!
This is such a great step by step tutorial. I think this is incredibly helpful for so many niches. I wish I would have thought more about keywords when I named my blog. I must check out grammarly I keep forgetting to haha. Thanks for all the tips!
Yes, check out Grammarly. You can upload it to your phone and laptop. So even your texts have proper grammar!
This post is so on point!! Thanks for sharing BB!
Cathclaire | fashion, travel, and mindfulness blogger
http://www.cathclaire.com
I love your post, really helpful! Now I have an idea of how to start my own travel BLOG.
I hope that this will help. It has been a fun and challenging journey for me.
Great Post for beginners who want to start blogging. Thanks for providing this easy to follow step by step guide 🙂
Thank you< Marco, for stopping by. I really needed simple, step by step instructions when I was starting out. I hope it is helpful.
Thanks for all the tips! I’ve still got so much more to learn!
So do I!
Great check list for new bloggers but I would add a note that you also need to promote and SEO the post. Maybe some ideas for a next step posts.
Agree 100%. And I plan on breaking down all of the steps in more in-depth posts coming up. I will include promoting and SEO, great idea. Lots of content to work with!
Thanks for the tutorial! So true about editing and re-editing. Even when I’ve posted content that’s a couple weeks old, I find myself going back and making changes.
http://soulandstreusel.com
I do, too! Always editing! Thank you for stopping by.
Thank you for sharing these great blogging tips 🙂 Loved reading this article.
I am glad you liked it.
Great Steps Ever for the Readers…Specially thanks for such a wonderful writing!
Great update on this post, Jenny! I love the new look of the site and your new logo is so perfect!
Thank you! It love it, too. So much better!
Easy to follow steps. Very well written. Perfect for new bloggers.
Thank you, Nadia.
Thanks for all the tips. Do you know of any good themes to use for travel bloggers? I would be interested in that, thanks
The ASHE theme was great for starters. Simple to use, clean and pretty. The theme I have now is a paid theme from Bluchic. They have some gorgeous themes to choose from. I found these two posts about top travel blog themes, one from WP Beginner, https://www.wpbeginner.com/showcase/best-wordpress-themes-for-travel-blogs/. Here is one from Design Bombs, https://www.designbombs.com/best-wordpress-travel-themes/. Let me know what you think of those.
Great post! I just launched my travel blog 3 weeks ago and this is definitely useful. I like the headline tips and where to find graphics since I’ve been only trying to use my own which is proving challenging 😂
Pinning this for future reference!! Thank you!
I feel ya, I tried to use my own images, too. And I still do, although very little. Thank you for sharing the post.
Such an useful post! I have to agree this demands so much time, but the good thing is that is something you really love so is worth it
It is time-consuming, but it is fun, and I have learned a ton.